Oil Change
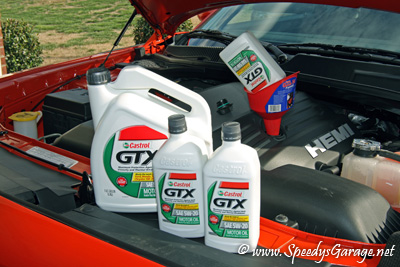
This article will discuss changing the
engine oil
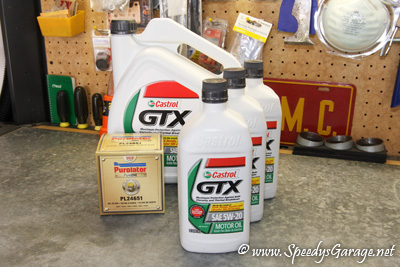
in the Challenger. I personally use Castrol GTX 5W20 and a Purolator
PureONE oil filter on this vehicle. My reasons for choosing this
combination go back to research and testing I've done with other vehicles using
this combination over the years with excellent results. The oil analysis,
my reasons for not using synthetic oil, etc are outside of the scope of this
article. I will write a future article on that topic. In the mean
time if you want to learn more about motor oil than any sane person should, grab
a cup of coffee and point your browser to www.bobistheoilguy.com and start reading.
In order to maintain your lifetime power train warranty, you must change the oil with the viscosity designated in the Challenger's owner's manual every 6,000 miles or every 6 months. Which ever occurs first.
For this maintenance you'll need:
7 quarts of oil in the viscosity specified
in your owner's manual (mine says 5W20)
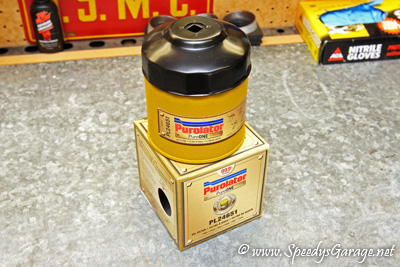
1 oil filter - I use a Purolator PureONE P/N PL24651 on my 5.7L V8
Funnel - A larger funnel with a 1" or so opening in the spout works best
93mm 15 flute oil filter wrench for a 3/8" socket wrench
3/8" socket wrench
12" 3/8" extension - optional but highly recommended
13mm box end wrench
4 Jack Stands or 2 Jack Stands and 2 vehicle ramps
Vehicle Jack
Oil drain pan
Newspaper
Fender Protector - optional
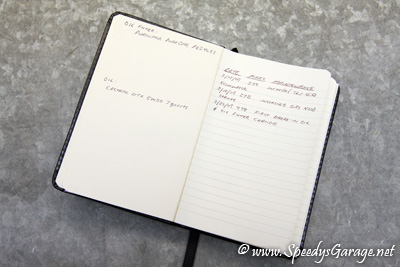
Maintenance Log Book - optional but highly recommended
Difficulty Rating: 

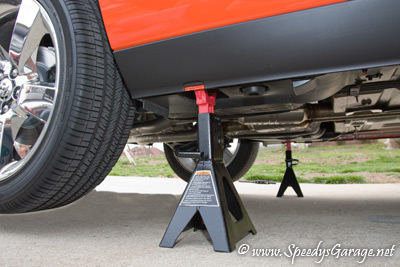
It's best to drain engine oil at operating temperature so take the vehicle for a quick spin before beginning to get it up to operating temperature. Raise and support the vehicle to gain access to the under side. You can either use jack stands at the front support points, or drive the vehicle up on ramps. which is how I do it. DO NOT support the vehicle with a jack as serious injury can occur. The goal is to have the vehicle supported to allow easy access to the under side, but BE SAFE!

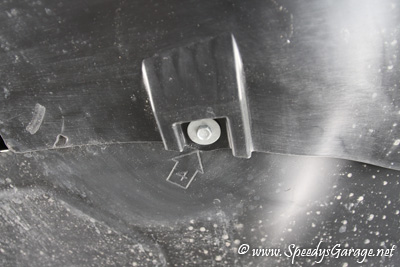
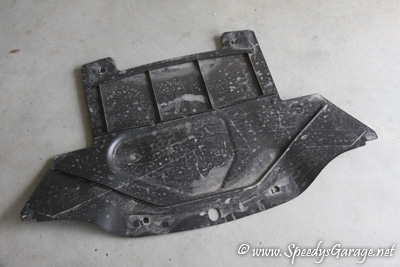
Once the vehicle is securely and safely supported, remove the splash shield from the front of the vehicle. There are four 10mm bolts holding it in place numbered 1-4. Remove them in order, and set the splash shield aside.

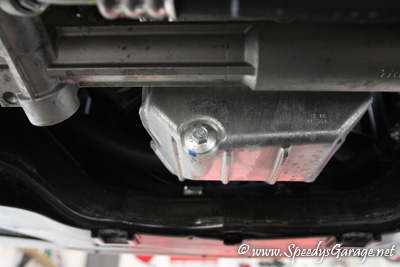
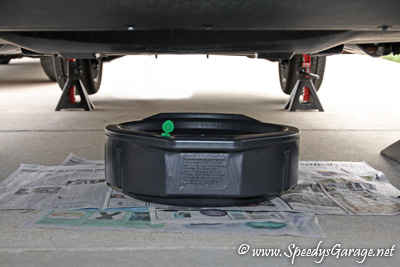
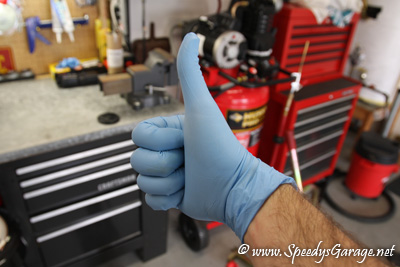
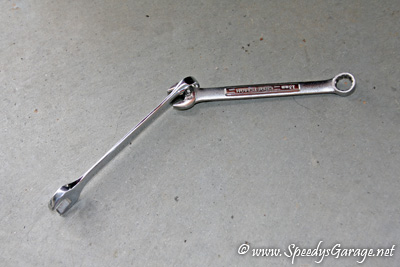
With the splash shield removed, you can now see the oil pan and drain bolt as well as the oil filter just to the passenger side of the oil pan. Place some newspaper on the ground under the oil pan and oil filter. Place your oil drain pan on top of the newspaper and loosen the oil drain bolt using a 13mm box end wrench. I've got some tips here...one is to wear nitrile gloves. This will make clean up much easier and keeps all the oil off your hands. The second tip is to hook two wrenches together to give leverage on the oil drain bolt. I personally like to use box end wrenches to remove oil drain bolts as they prevent stripping the bolt and are easier to clean than a ratchet. Finally, removing the oil filler cap from the top of the engine before removing the oil drain bolt will make the oil drain in a much more controlled fashion making for less mess and spatter.
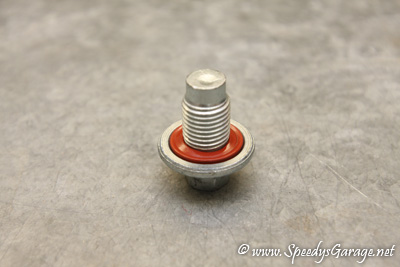
It'll take about 5 minutes for the oil to completely drain from the engine. During this time, clean up the oil drain plug and inspect the bolt for any signs of wear, especially the gasket. Replace the bolt if necessary.
Also, pre-fill the filter with oil so that it is full when installed on the vehicle. The service manual says this isn't necessary, but since the filter is mounted vertically it's easy to do and can't hurt. Be sure to fill the filter slowly, giving time for the media to absorb the oil, then fill some more. It may take several minutes for the media to become saturated.
Once the oil completely drains, reinstall the oil drain bolt. I didn't have torque specs for this bolt, so I installed it tight plus 1/4 turn. Be careful not to over tighten or you could crack the oil pan. Clean any remaining drips of oil from around the drain bolt area.
Using a 93mm 15 flute oil filter wrench, loosen the oil filter a few turns. A little oil will drain from the filter once loosened, so be ready with your oil drain pan. I used a 12" extension on my ratchet to make for easier access to the oil filter. If this is the first oil change on your Challenger, expect the oil filter to be TIGHT. I don't know who installs these things at the plant, but they're over doing it. Mine was so tight that it pulled the filter gasket out when I removed the filter. Having said that always double check the filter and mounting location on the engine block to be sure the gasket didn't get left behind when you removed the filter. Once the oil has finished draining from the loosened oil filter, unscrew it from the engine block being careful to keep it up right. The filter is full of oil. Once removed dump the oil from the filter into your oil drain pan.
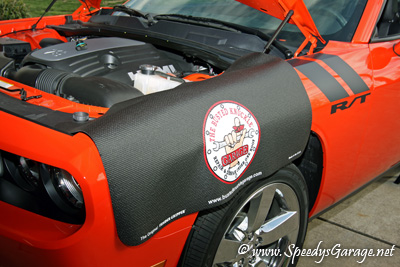
With the oil filter removed, clean the area on the block where the oil filter mounts and inspect to make sure everything looks as it should. Apply a light coat of fresh motor oil to the gasket of your new oil filter and thread it onto the oil filter mount on the block. I always install oil filters hand tight plus 1/4 turn. That's all it takes. Now you're ready to refill the engine with fresh oil. Protect your fender with a fender cover, or be very careful not to slide down the side of the car when working under the hood. Buttons, belt buckles, and just dirt on the paint can scratch up your paint, so I always put a cover over my fender where I'm working. They're cheap insurance.
Fill the engine with 7 quarts of oil. Once filled, re-install the oil filler cap and start the vehicle. Pay close attention to the oil light on the dash to make sure it goes out. Once the light goes out, wait about 5 seconds and shut the vehicle off and check for any leaks. If everything looks good, reinstall the splash shield in the reverse of removal using the four 10mm bolts. The torque specification on the 4 bolts is 35 inch pounds or 4Nm.
Making sure the vehicle is on level ground, check the dip stick to insure the proper amount of oil has been added. The dip stick is located on the passenger side of the motor and has a yellow pull ring. Pull the dip stick out, wipe it with a clean cloth, and reinsert it into the engine until it completely seats. Pull it back out and inspect the oil level. Holding it at an angle to light will make it easier to see where the oil level is on the dip stick. The level should be in the "safe" range on the dip stick. Seven quarts of oil put my oil level right in the middle of this "safe" area.
For those Challengers equipped with an oil monitoring system, you'll want to reset the engine oil change indicator system. This reset information is located in the owners manual and states:
1. Turn the ignition switch to the ON position (do not start the
engine).
2. Slowly depress the accelerator pedal three times within 10 seconds.
3. Turn the ignition to the OFF/LOCK position.
Plan on about one hour to change the oil in the Challenger. It's a fairly simple procedure. Jacking up the vehicle is really the hardest part. Also, I personally keep a maintenance book to write down when I perform various maintenance procedures noting the date, the miles on the vehicle, and the maintenance I perform. This not only helps me know when to perform maintenance, but also helps resale value down the road as buyers know the vehicle has been taken care of. You'll also want to keep the receipts from the oil and oil filter purchases in the event you ever need to prove you're properly maintaining the vehicle for warranty work. Be sure to drop off your used oil at an oil recycling center. Just about any auto parts store has an area to accept used oil.