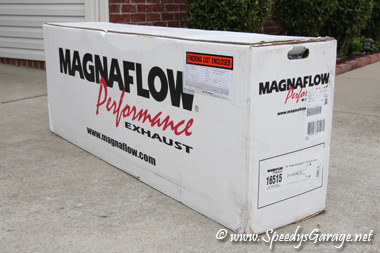
Magnaflow Cat-Back Competition Series P/N 16515
The stock exhaust on the Challenger sounds pretty good, but like everything we can always make it better and try to add a little performance at the same time. Choosing an exhaust system is something a lot of people agonize over, and for good reason. The exhaust note of a car like the Challenger is as important as the paint color. Exhaust systems are also expensive, so you want to get it right the first time. There weren’t a lot of Challengers around locally for me to hear the exhaust systems in person, so I had to rely on internet videos which can be a poor representation. Most folks don’t have the equipment or the video editing expertise to capture the sound properly. The speakers you’re listening to the sound through will have an effect as well. My advice is to try to go to car shows for better chances of finding one to hear in person. If that’s not an option, look for GOOD QUALITY videos. The videos in this article are as high quality as I could make them using a good camera with 5.1 channel mics. If you have good speakers, these will be pretty accurate. In the end I decided on a Magnaflow Competition Series P/N 16515 and got a GREAT PRICE and top notch customer service from Custom-Performance. These guys kept me up to date on the status of my order all the way through to delivery, which was lightening fast. If you're shopping pricing I'd suggest you check with these guys.
Stock Exhaust Exterior: 00:50 |
Magnaflow 16515 Competition Series Exterior: 01:45 |
Stock Exhaust Interior: 02:36 |
Magnaflow 16515 Competition Series Interior: 03:15 |
Some tid bits you might find interesting:
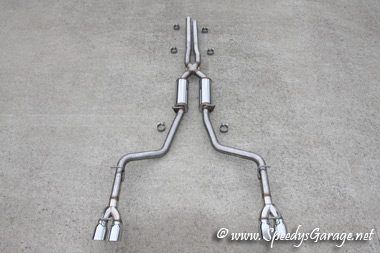
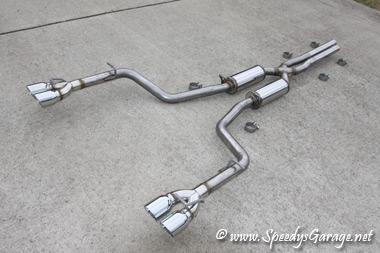
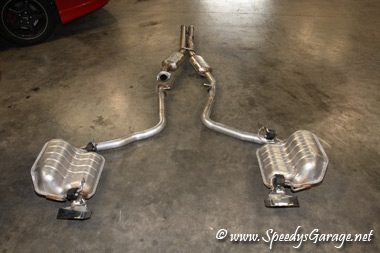
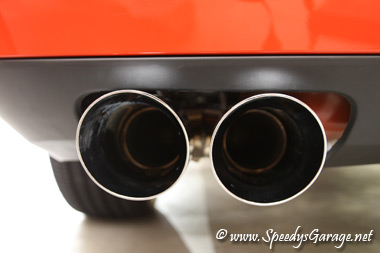
The stock exhaust weighs 71 pounds! The Magnaflow exhaust weighs 48 pounds, a savings of 23 pounds. This “competition” exhaust has 6” x 14” mufflers. I feared it might be too loud with such small cans, but it’s perfect. The systems are very well packed for shipping using expandable foam liquid in plastic to completely surround the exhaust.
For this Modification you’ll need:
Magnaflow cat-back P/N 16515
Torque wrench
15mm box end wrench
13mm socket
Socket wrench
6 inch socket wrench extension
WD-40
Difficulty Rating: 

Installation:
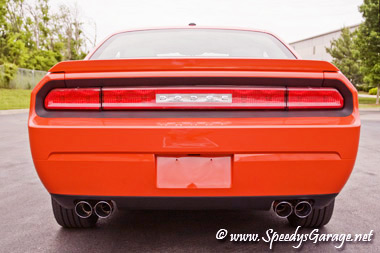
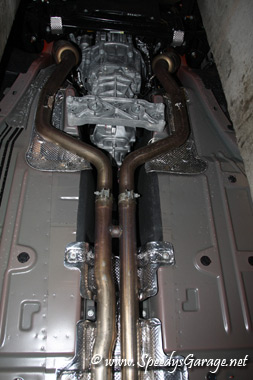
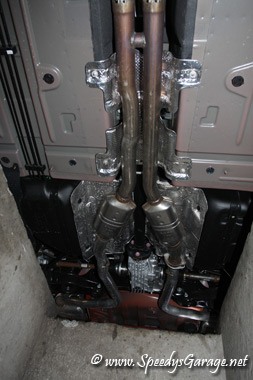
Special thanks to my buddy Chris for helping me with this install. Make sure the exhaust is cold. Begin the installation by removing the negative battery terminal and support the vehicle on a lift or jack stands. My Challenger is a six speed manual which has a different exhaust setup than an automatic, but the removal should be similar on an auto. Loosen the 15mm bolts at the front most exhaust clamps that attach the stock exhaust to the catted down pipes. Spray some WD-40 on the rubber mounts just in front of the differential. Remove the two 12mm bolts on the driver’s side tail pipe that hold the springs in place. Remove the two 13mm bolts that hold the two rear most exhaust hangers on the driver’s side tail pipe to the vehicle body. Remove the driver’s side tail pipe. The two rear most exhaust hangers and rubber isolators should still be attached to the tail pipe, but the rubber isolator in front of the differential should stay attached to the vehicle. Here are a couple of shots of the stock exhaust for reference.
The rest of the stock exhaust is all one piece. Remove the two 13mm bolts on the passenger side that hold the two rear most exhaust hangers to the vehicle body and slip the exhaust from the rubber isolator in front of the differential. The two rear most exhaust hangers and rubber isolators should still be attached to the exhaust, but the rubber isolator in front of the differential should still be attached to the vehicle body. Slide the exhaust out toward the rear of the vehicle in a rocking motion. Removing the stock exhaust took me about 15 minutes.
Slide two pipe clamps over the catted down pipes and slide the Magnaflow extension pipes over the catted down pipes. Pay attention to the orientation of the pipes as one is longer than the other. The longer one goes on the passenger side. Slide two more pipe clamps over the Magnaflow extension pipes and slide on the Magnaflow “X” pipe assembly. Spray some WD-40 on the rubber isolators in front of the differential and slide the Magnaflow “X” pipe assembly hangers into the rubber isolators. Transfer the exhaust hangers and rubber isolators that are still attached to the stock tail pipes over to the Magnaflow tail pipes. Pay attention to their orientation and match the direction of the hangers up like they were on the stock tail pipes. Slide pipe clamps over the Magnaflow “X” pipe and attach the Magnaflow tail pipes. Attach the two hangers on the tail pipes back to the vehicle using the stock 13mm bolts. DO NOT TIGHTEN ANY PIPE CLAMPS UNTIL THE EXHAUST IS ADJUSTED PROPERLY.
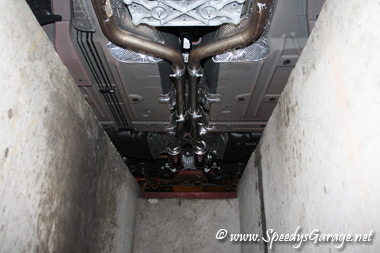
Adjust the exhaust so that there is at least 1/2” of clearance all the way around from any body panels or parts. Center the exhaust tips in the valance openings. Once everything is aligned properly, tighten all the clamps moving from front to back. Magnaflow states to torque the 15mm clamp bolts to “about 65 ft/lbs”, however I felt that was getting a little too tight and stopped at around 58 ft/lbs. I basically stopped when the clamps were completely compressed against the spacers. Once it’s all tightened down reconnect the negative battery terminal.
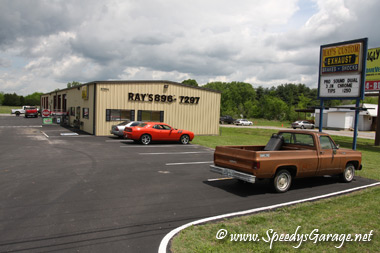
Aligning the exhaust was the hardest part of the install for me. The passenger side went on just fine, but the driver’s side gave me a lot of problems. No matter how much adjusting my buddy and I tried to do the driver’s side tip kept touching the rear valance. I was finally able to get about 1/4” of clearance on the driver’s side in order to perform the dynos without melting something, but I ended up having to go to an exhaust shop to get the tip adjusted properly. The exhaust shop double checked my install and confirmed everything was correct. The issue was with the rear exhaust hangers. They ended up having to cut the hangers, adjust the tip for proper clearance and re-weld the hangers to the exhaust pipe. If you're in middle TN and need exhaust work done, the folks over at Ray's Custom Exhaust in Smyrna are great.
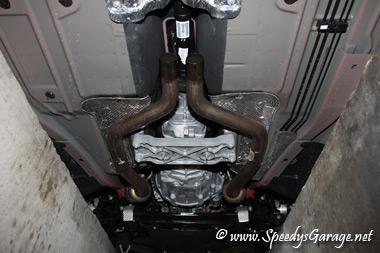
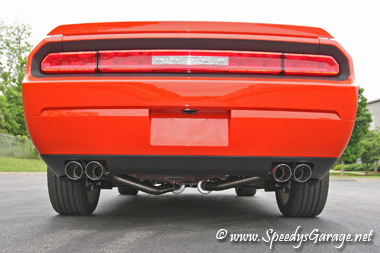
I checked with a couple of other folks who purchased this kit and they too had issues with the driver’s side tail pipe aligning properly. I’ve called Magnaflow to let them know of the issue and will update this article once I hear back. Magnaflow asked for pictures which I sent to them for review. I believe there is an issue with the way the driver’s side tail pipe is bent. You can also notice that the driver’s side pipe is bent slightly different from the passenger side in the picture below as it hangs down about an inch further.
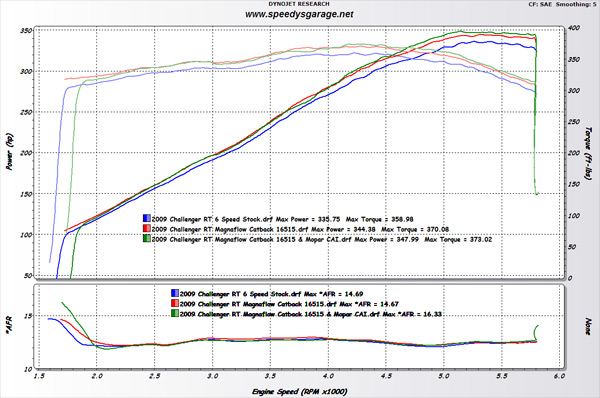
On the dyno, the car gained right about 10HP and 12 ft/lbs of torque with the exhaust alone. Over time I’d expect a few more ponies as the computer adjusts to the new parameters. After dynoing the exhaust with the stock air box and filter, I re-installed my Mopar CAI and did a dyno of the Magnaflow exhaust coupled with the Mopar CAI intake to see if there was any difference. To my surprise the runs showed no change. Again, that may change over time as the computer adjusts. I’ll go back after a thousand miles or so and run another dyno test to see for sure and then begin tuning with a Predator to see what it’ll do.
From my Mopar CAI Article the Challenger put down 335HP and 357 ft/lbs of torque stock. This set of dyno runs were made with the exhaust and the stock air box and filter vs. the exhaust with the Mopar CAI. The vehicle had 1,337 miles on it. Here are the numbers from the runs with the best number being 348HP and 373 ft/lbs of torque.
Magnaflow 16515 and Mopar CAI DYNO: 01:39 |
Magnaflow 16515 HP |
Magnaflow 16515 Torque |
Magnaflow 16515 and Mopar CAI HP |
Magnaflow 16515
and Mopar CAI Torque |
Run 1: 347.01 |
373.36 |
347.98 |
373.02 |
Run 2: 344.40 |
370.07 |
346.64 |
373.70 |
Run 3: 343.85 |
365.20 |
347.01 |
368.26 |
Average: 345.09 |
369.54 |
347.21 |
371.66 |
The sound of this exhaust is magnificent and is exactly how a car like the Challenger should sound. The volume inside the car is the same as stock cruising around. Under light load at 1800 – 2200 RPM there is a small amount of drone, as well as when letting off the gas coasting to a stop as the RPMs drop. The drone is very reasonable and not an issue to me or my girl friend. It’s not one of those droning exhausts that gives you a headache by any means. Under hard acceleration it’s a symphony of eight firing cylinders with a nice bark. I love the sound as it’s not obnoxious but powerful and rich. My neighbors even like it. With all that said, keep in mind that exhaust tone is very subjective and what I love you may not, but so far I’ve gotten nothing but compliments on the sound that now emanates from the Challenger.
All in all I’m pretty happy with the kit. My only complaints revolve around that driver’s side tail pipe being off on alignment initially. Other than that it’s a winner.