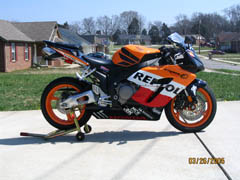
Honda CBR 1000RR Mototeck LED Flush Mount Turn Signals
March 2005
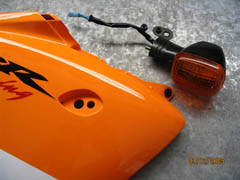
After getting the rear turn signals
integrated using the Clear Alternatives unit, I began a search for something
that would work for the front signals. I had several requirements which
included using LED technology, compact design that would still allow 360 degree
viewing of the turn signals, no fairing modification, and sturdy mounting.
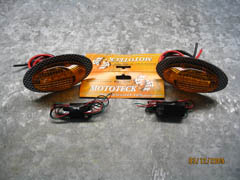
I came across the Mototeck LED flush mounts at
www.sportbikeeffects.com and they fit the bill
nicely. They come in a variety of styles with a variety of trim colors as
well as no trim at all and include 6 large LEDs that are bright. I had
hoped to be able to get the no trim model, but they are so small that they would
not cover the hole in the fairing the stock signals leave. I went with the
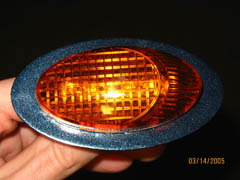
carbon fiber "look" trim. The signals measure 2 5/8 inch long (65mm) by 1
5/16 inch wide (33mm). The signals with trim measure 3 3/8 inch long
(85mm) by 1 3/4 inch wide (45mm).
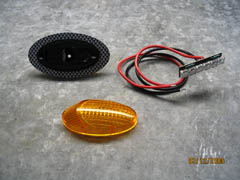
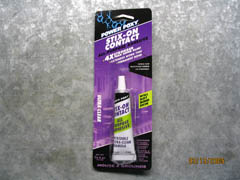
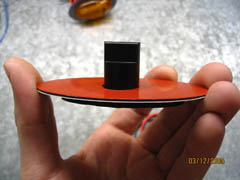
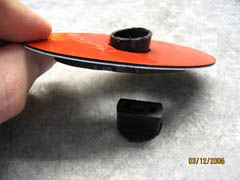
I disassembled the turn signals. I was curious as to how they were designed, plus I needed to make some slight modifications to the housings to allow them to fit the front fairing on the 1000RR WITHOUT fairing modification. To disassemble them, just pull the lenses off the bases. Be advised, the plastic lenses are very brittle. The lenses are held to the bases by small plastic tabs which snapped on both of my lamps. I wasn't too concerned as I had already planned on using epoxy to put them together to make them more bullet proof. If you go this route, make sure the epoxy is plastic safe and dries crystal clear with no yellowing. I picked the below up at Wal-Mart for about $1.50 US. It worked pretty well, but was a little stringy. As you can see the design of the turn signals is simple and effective.
 |
 |
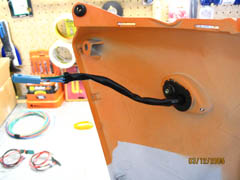
I used a dremel tool to cut off the back stalk of the turn signal housing once I had removed the LEDs and wiring as shown in the picture above. I took the upper fairing off the 1000RR and used it as a guide so that I trimmed just enough to allow it to fit without having to cut a hole in my fairing. To remove the upper fairing you'll need to remove the 7 allen button bolts, 2 phillips plastic tabs, and one plastic pull tab on each side of the bike. The stock turn signal is held on with a single 10mm bolt on the back side of the upper fairing. I've heard rumor of the upper fairings on the 1000RR cracking around the turn signals. Once I had taken the fairings off to have a look I could see why this was occurring as there is only a small bit of plastic holding the lights on. If you bump or brush against the stock turn signals I can see it putting enough stress on the plastics to crack them. This is another good reason to go to flush mount signals.
 |
 |
 |
 |
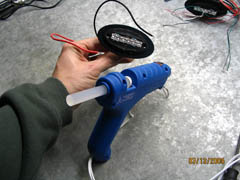
I decided I didn't like the carbon fiber "look" trim. I began wondering if I could paint the trim to match my 1000RR. I looked all over for Repsol orange as I wanted the turn signals to just blend into the bike and is one of the reasons I went with the amber lenses instead of clear. I never could find an orange that was close enough. I did find a metallic blue that was almost an EXACT match, however. It is made by Dupli-Color and is color number 294 Twilight Blue. I picked it up at a local Advanced Auto for about $5.00 US. I sanded the carbon fiber "look" trim with some 220 grit sandpaper. I then taped up the bases where the lenses attached as well as taped the wiring. I then primed it with 2 coats of primer and let it dry according to the primer can instructions. I then applied 4 good coats of the metallic blue. The finished product looked great and I was glad I didn't use orange as the blue accent offset the turn signals nicely and went with the color scheme of the bike as well. I then sanded the area where the LED unit mounted inside the Mototeck base with 220 grit sandpaper, and hot glued the LED unit to the base. Sanding insures the LED unit holds fast and makes the hot glue much more effective, but still allows me to pull the LED unit out should the need arise. I then used the epoxy to attach the amber lens to the base. I also used the hot glue to seal up the stalk where I had cut it to fit the fairing. This insures it is water proof. I also put a zip tie around the wires close to the stalk to keep them from bending too close to the soldered connections. Again, I try to make things bullet proof.
 |
 |
 |
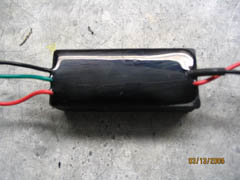
I ordered the Mototeck kit that allowed the turn signals to operate as the running lights just like the stock Honda turn signals do. There is some design issue with the little electronic relays that Mototeck uses to accomplish this. It was only a $10.00 US option, but I recommend you only buy the turn signals and use the VFX LED Running Light Kit to accomplish the running light function. My theory is that Mototeck relies on the running light to maintain a +12V source when the turn signals are activated as some other bike manufacturers do. Honda DOES NOT do this. When you activate the turn signals, the running light wire does not have power. My running lights would work, but no turn signals. I decided to just hook up the turn signals for the time being, and order the VFX kit to solve my problem. The picture below shows what the Mototeck relay unit designed to allow running light operation looks like.
To hook up the turn signals ONLY, simply connect the LIGHT BLUE wire from the bike's RIGHT side turn signal to the RED wire on the Mototeck signal. Hook up the GREEN wire from the bike's RIGHT side turn signal to the BLACK wire on the Mototeck signal. Tape off the third wire from the bike. Perform the same operation on the left side of the bike using the ORANGE wire from the bike's LEFT side turn signal to the RED wire on the Mototeck signal. Hook up the GREEN wire from the bike's LEFT side turn signal to the BLACK wire on the Mototeck signal. I recommend cutting the connector off of your stock turn signals and using that for your wire splicing as that will keep you from having to cut the wiring on your bike. Also be sure to use good weather proof heat shrink connectors as well as heat shrink tubing for all connections.
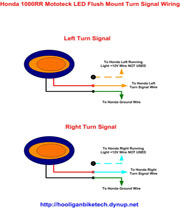
Through discussions with some message board members, I've learned you can enable the running light functionality on Honda motorcycles by using diodes. I have not done this personally, but it looks like it should work fine and others have done this successfully. Basically the diode limits current to one direction only. Since Honda does not keep the running light wire high when the turn signal is activated, the turn signal line is the only one powering the LEDs, thus they flash. Once the turn signal operation is cancelled, the running light wire goes back high, and powers the LEDs in running light mode. The diode only allows current to flow toward the LEDs, preventing any short circuit conditions, or back flow of current through the system. This is a cheap and easy fix if you don't want to spend the money on the VFX LED Running Light Kit. The wiring diagram is below. Diodes are directional, so make sure they point toward the LEDs. I recommend using 1N5400 diodes.
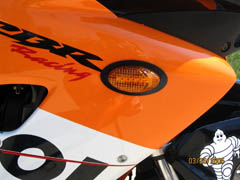
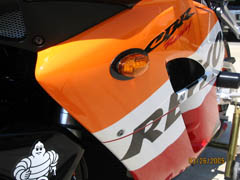
The final step is to mount the Mototeck signals to the bike. Decide the best position to put the signals as once they're on, they don't move. I tried to line mine up with the lines in the front fairing. Wash the area around the stock turn signal holes with dish detergent and hot water. This will remove any grease or wax. Then wipe the area down with an alcohol swab. Once it all dries, heat the area around the stock turn signal holes with a hair dryer as well as the double sided tape on the Mototeck signals. Once it's warm, peel off the backing and press the signals into place. Be sure you're happy with the position of the signals before you seat them. As I've said, once they're seated, they WILL NOT come off easily and if you do move them you'll need new tape. I was able to hold the fairing up by the Mototeck light and it didn't even give an inkling of coming off. I was a little concerned about using double sided tape for these flush mount LEDs, but not any longer.
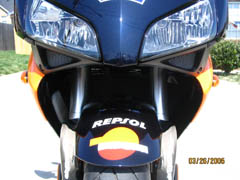
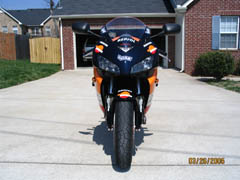
I'm extremely happy with the way the Mototeck turn signals look on the bike. The install was fairly easy, even though the running light functionality is a no go, at least on my Honda 1000RR. Jeff at www.sportbikeeffects.com was great to work with as well as Mototeck who were both courteous and patient and tried to help me solve the problem with the running lights. Mototeck also sent me two new relay units, which also did not work, so I believe these will just not work on Honda 1000RR electronics. I highly recommend ordering these from www.sportbikeeffects.com if you decide you want a set, just skip the running light option.
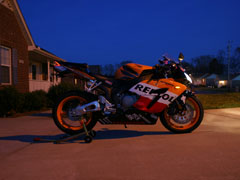
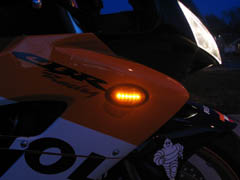
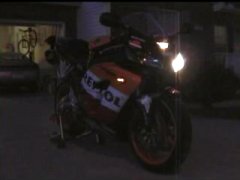
As you can see from the pics below, the turn signals are visible from just about any angle. I will add pics soon showing them at dusk so you can get an idea of how bright these units are.
This page is part of a frame set. If you reached this page via a search engine please click here to go to the main page.