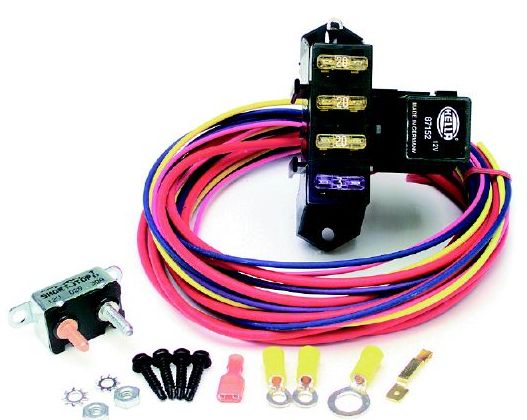
*Picture courtesy of Painless Wiring
Cirkit Boss Fuse Block
I like to isolate electrical accessories from the factory electrical system whenever possible to avoid any potential issues with the factory system, as well as make things easier to trouble shoot with the accessories. The best way to accomplish this is with a dedicated add-on fuse block. Painless Wiring has several to choose from that are reasonably priced and effective. I went with their three fuse ignition hot block that includes a 40amp relay and circuit breaker P/N 70113.
*Picture courtesy of Painless Wiring
For this modification you'll need:
Your choice of Fuse Blocks (you can make
your own, but the Painless Wiring pieces are nice)
1/2" and 3/16" heat shrink tubing (I like GB Electric Brand)
Quality electrical tape
1/4" split wire loom
Wire Strippers
Electrical Crimper
Drill
1/4" socket adapter for drill
5/64" drill bit
These Painless Wiring fuse blocks offer three levels of protection. The circuit breaker between the 12V source (battery) and the relay, the relay itself, and finally the fuses at each accessory connection. The one I chose has all three accessory wires hot only when the ignition is on. They have other models that have some constant hot accessory wires. Just be sure to pick the one you want appropriately as each one is different and can handle different electrical loads.
Hooking the fuse block up is very simple. Each wire is color coded AND labeled the length of the wire which is a nice feature. Chose an appropriate place to mount the fuse block. I decided to mount mine in the driver's side kick panel next to the factory fuse box and wiring so it had a factory installed appearance. It was a little tough contorting myself under the dash and I had to temporarily remove the VSC/TRAC computer to give enough working room for the drill to mount the block, but in the end it was worth it. In this location the fuse block is protected from the elements and heat of the motor. A second alternative would be to mount it in the engine bay on the firewall. If you decide to do that, I'd suggest getting the weather resistant fuse block that includes a rubber cover.
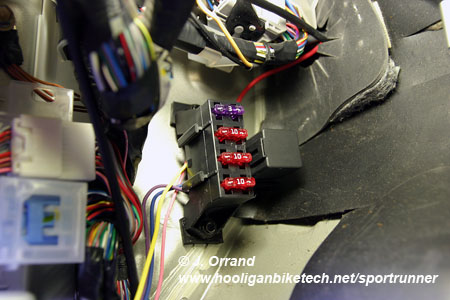
Once I had the location picked out, I used a 5/64" drill bit to make a scratch on the panel where the mounting screws would go, then drilled two pilot holes for the included self tapping screws. I then mounted the block using the optional rubber spacers to give a little more room for the wires to run underneath and to keep them from being bent so tight. These rubber spacers also give a little vibration dampening. You can see these spacers in the picture above. The ground for the relay is attached to the top screw, so be sure you mount this to a good body surface. You can also see how I ran the main power wire through the firewall grommet to the engine bay.
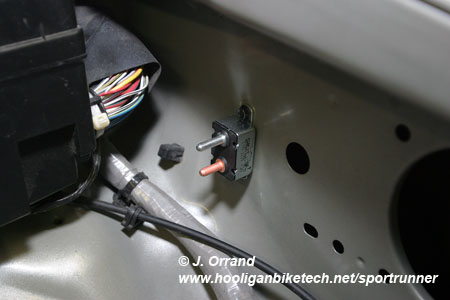
Once the block is mounted simply run the red main power wire to the battery, being sure to put the circuit breaker inline between the fuse block and the battery. The circuit breaker is labeled to let you know which connection goes to the battery (the red post on mine). As extra precaution, I ran the main power wire inside 1/4" split wire loom. I also used heat shrink on the ends of all the loom to hold it firmly in place. After taking a good look around the engine bay, I decided to mount the circuit breaker on the inner fender behind the battery. I had to remove the battery to get access, but this location has it close to the battery and protected from the elements. Again use the 5/64" drill bit to make pilot holes and the included self tapping screws to mount the breaker. Use the included ring terminals on each end of the wire to connect it to the breaker. The wires are about 5 feet long, so you have plenty to work with. They can also be easily extended if need be.
 |
 |
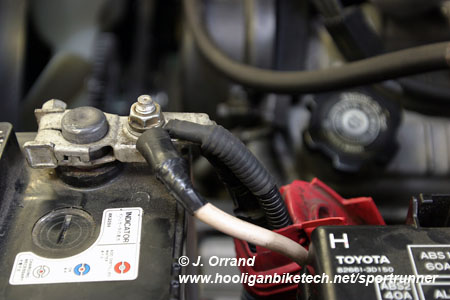
Then connect the circuit breaker to the battery using the provided ring terminal. You can see in the picture how I used heat shrink over the terminal connection as well as the split loom for extra durability.
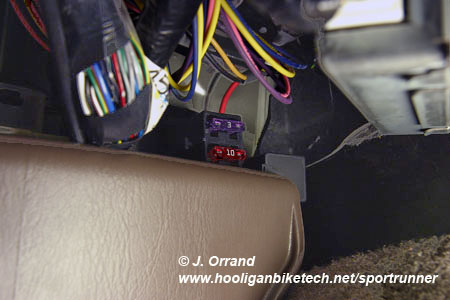
Finally, connect the ignition activation wire to the +12V side of an ignition hot fuse in the OEM fuse box and run the fuse block power wires to your electrical accessories. When the ignition is switched on, this wire ot the fuse box gets +12V which closes the relay allowing 12V to flow through it from the battery to the accessory wires. I will be powering my custom performance gauges and LC-1 wide band with one lead and a radar detector with another leaving one left for future use. Just be sure not to exceed the rated load of the fuses in the block. Here's a shot of mine all buttoned up and safely tucked behind the kick panel.