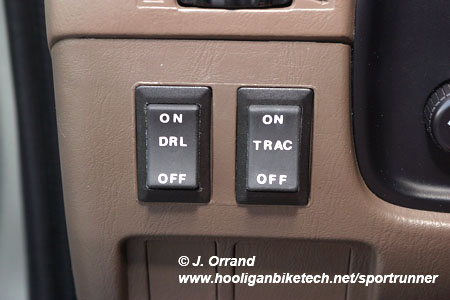
DRL Switch
One thing that always bothered me was the fact that the head lights on later model 3rd generation 4Runners came on whenever you lowered the parking brake. Sometimes I'd want to pull up and not disturb people by shining my lights in their windows at night, or when camping I'd not want to spot light all the people trying to relax around their camp fires. I began searching for a way to wire in a switch to turn these daytime running lights off at will, like Toyota SHOULD have done.
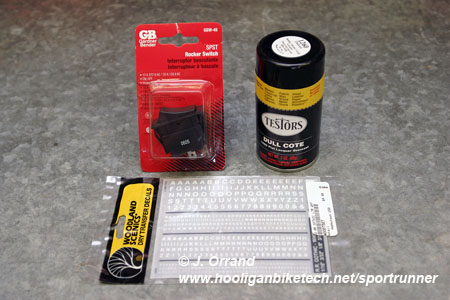
For this modification you'll need:
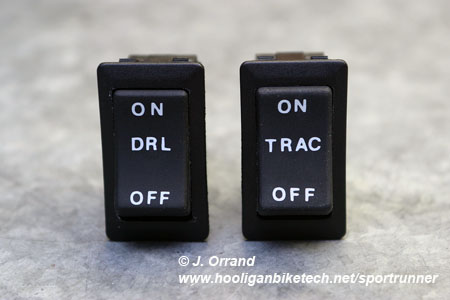
1 dash switch (I found some at Lowe's made
by GB Electric for $4 that match the factory switches)
6 feet of 18 gauge wire (I recommend 2 different colors)
4 female spade connectors (I recommend the insulated type)
2 male spade connectors (I recommend the insulated type)
Dry transfer letters - I used
Woodland Scenics brand Gothic R.R. font (optional)
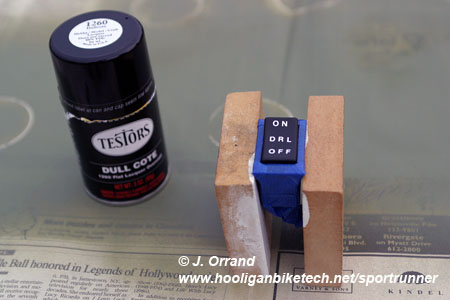
Clear coat spray for plastic (optional) - I used Testors 1260 Flat Lacquer
Painter's Tape (optional)
220 Grit Sand Paper
Paint Prep (optional)
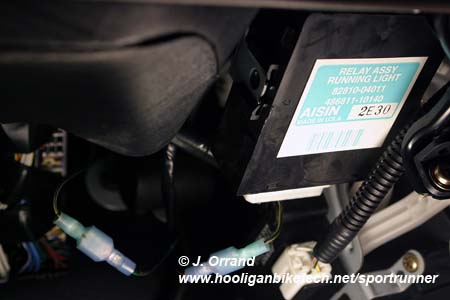
I can't take credit for the solution to this problem as I found the answer online, but this is my implementation. This article applies to 2002 model year 4Runners with the above DRL relay assembly so double check yours to make sure it matches if you plan on implementing this DRL switch solution. The part numbers on the DRL relay assembly are
82810-04011
486811-10140
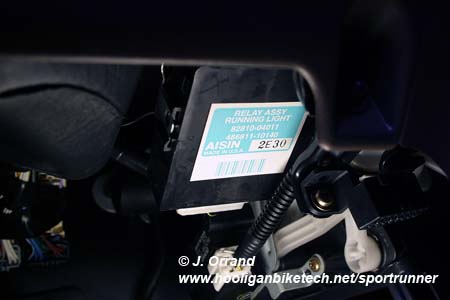
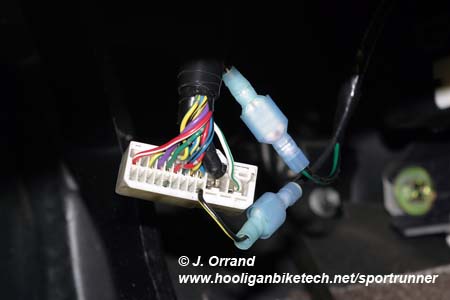
The procedure to wire in the switch is very simple. Disconnect the negative battery cable. Cut the black with yellow stripe wire located at pin 12 on the connector going into the DRL relay assembly and connect one cut end of this black with yellow stripe wire to one end of your 18 gauge wire using a male and female spade connector, then connect the other end of your 18 gauge wire to one of the pins on your dash switch using a female spade connector. Repeat with the other side of the black and yellow striped wire. This black with yellow stripe wire is the power wire to the DRL relay assembly so you're simply inserting a switch for this power source giving you control over the DRLs. It does not matter which pin on your dash switch you connect each side of your 18 gauge wire to as it's simply an on/off solution.
|
|
|
Finally, just plug your switch in to a blank port on the dash and tuck your wires away. Reconnect the negative battery terminal. Now you can turn the DRLs on and off at will.
You'll notice in the picture of the DRL relay assembly connector above that I have electrical tape on the white with black stripe wire at pin 2. That is for the Fog Light Mod.
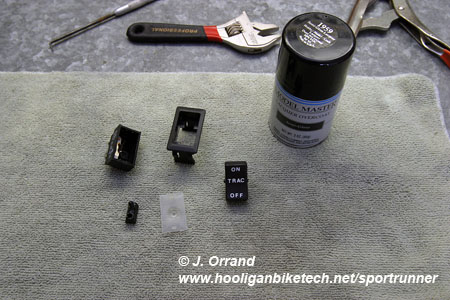
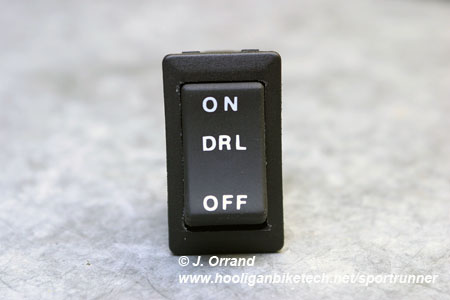
If you want to go an extra step and label the switch for a factory appearance, tape up the outer trim with some painter's tape and lightly sand the switch with some 220 grit sand paper to knock the sheen off. Once sanded, wipe the switch down with some paint prep. Next use a tooth pick and apply the appropriate dry transfer letters. These letters aren't the easiest things to apply to the switch as getting them even is quite a challenge so you may want to buy two packs of letters for some insurance. Once the letters are applied, spray 2-3 light coats of the clear lacquer on the switch. This will seal the letters and keep them from getting rubbed off with use. Be sure to use clear coat designed for plastic or it'll turn cloudy and peel. I learned that the hard way
.
|
|
|
Update:
After a couple of months with the dull cote on the switches, I noticed they'd show finger marks from use so I went back to the hobby shop and picked up some Testors 1959 semi gloss lacquer to spray on the switches which will make them easier to wipe down. I also found it was easier to take the switch apart and remove the rocker for painting.