|
|
|
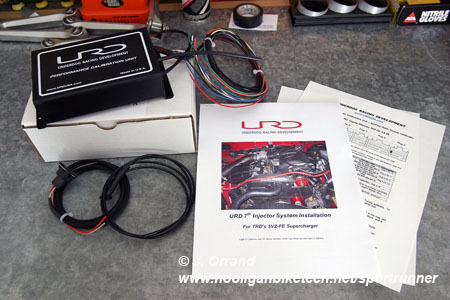
Underdog Racing 7th Injector Kit
After bolting on a TRD Supercharger there is some follow-up work and analysis required to have it run properly. Underdog Racing is a company that has spent many years developing the products to make a supercharged 3.4L engine more reliable, durable, and powerful. I've purchased several products from Underdog Racing and have found their staff to be knowledgeable, reliable, and above all available to answer any tech support related questions I may have had. You can view Underdog Racing's full line of products on line at www.urdusa.com. I feel very comfortable recommending this company to anyone building up a forced induction Toyota vehicle.
The URD 7th Injector Kit includes nearly everything you need to tune and fuel a supercharged 3.4L motor. The pieces are very high quality and well thought out. The only thing that you'll probably want to have on hand is an O-ring thermostat gasket which costs about $2 at any hardware store. The stock gasket may be OK, but why risk it for $2, just replace it. The kit includes a programmable ECU to control timing and fuel to a 7th injector with gasket and mounting hardware, 170 degree thermostat, 2 step cooler spark plugs, 7th injector, fuel line with T-fitting, restrictor T-fitting for ECU boost port, Walbro 190 fuel pump, heat shrink tubing, detailed instructions, and a vinyl URD decal.
|
|
|
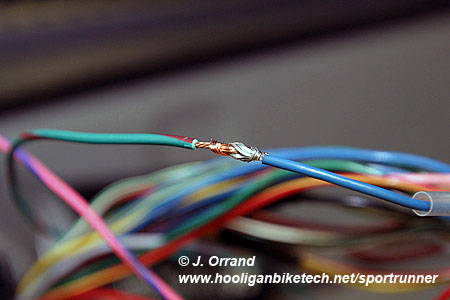
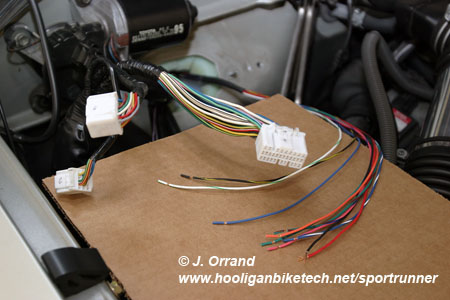
The installation instructions are detailed and the install is fairly easy if you have soldering experience. If not I suggest you practice on some scrap wiring. The trick to soldering is to put the soldering iron against the joint you want to solder and heat it enough that when you touch the solder to the joint it is pulled into the joint. You DO NOT want to touch the solder to the soldering iron to make the soldered joint. Make sure to use rosin core solder as well. No flux is needed. For splice connections, meaning you're joining two separate pieces of wire, the best method is to make a mechanical connection AS WELL AS a soldered connection for durability. The best way to accomplish this is to strip the wire enough to allow you to make a "J" on each piece. Hook the "J" pieces together and twist them to lock them in. That's your mechanical connection. Then solder it. Once soldered I suggest double heat shrinking it for durability.
|
|
|
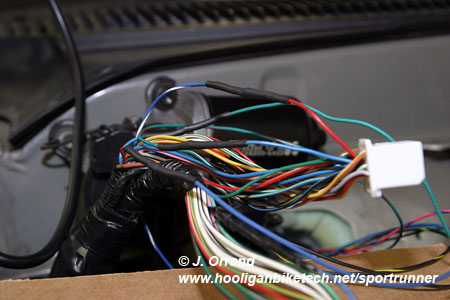
A tip that will save tons of time and back aches is to unplug the ECM connections one by one and use a Sharpie to label them A, B, C, D, and E. Then pull them through the firewall to work on them in the engine bay for easier access. Peel back the electrical tape to give you plenty of working room. and TRIPLE check your connections. I'd suggest going as far as to check the URD instructions against the Toyota FSM as well just to be sure. You definitely don't want any mistakes here as your soldering to the factory ECM.
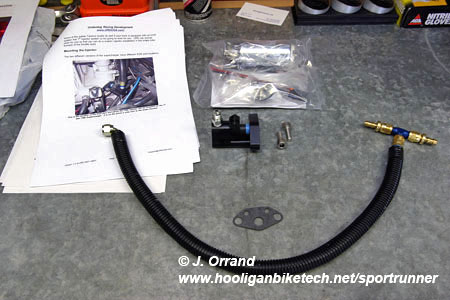
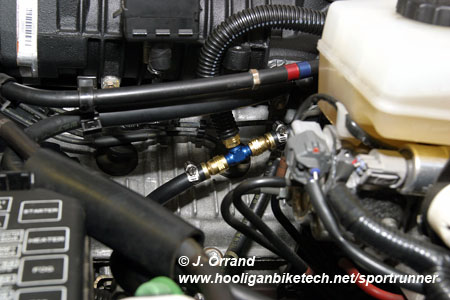
The ECU (called an AIC-T or FTC-T) has an integrated MAP (manifold absolute pressure) sensor to read absolute pressure from the supercharger and is required for the unit to work properly. When tuning the system, the timing and fuel map is like an Excel spread sheet with rows being RPMs and columns being PSI of boost. Simply run the supplied line from the engine bay to the AIC-T. Connect the supplied restrictor T-fitting into the boost line that goes from the supercharger to the stock FMU (fuel management unit). You must use the supplied T-fitting to help cut down on the buzz from the AIC-T's MAP sensor. In the image below you can see how I tied in the AIC-T boost line (top) and boost gauge line (bottom).
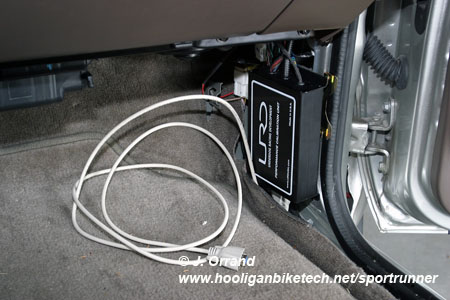
Pick a suitable location for the AIC-T unit. URD's instructions offer several suggestions and I liked the passenger side kick panel the best. This makes it easy to access and it's out of the way and hidden. Once I had everything where I wanted it, I wrapped the AIC-T in a good layer of bubble wrap and some gorilla tape for protection.
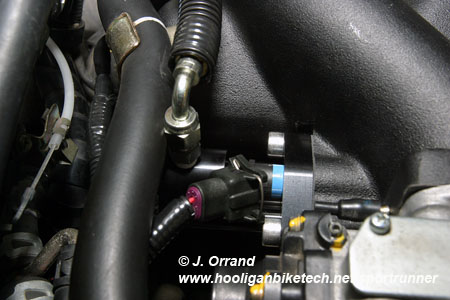
Finally, install the 7th injector. This is probably the easiest part, just be sure to follow the URD instructions on depressurizing the fuel system first.
|
|
|
My vehicle did not need the Walbro 190 fuel pump, but you'll want to do testing before deciding your particular vehicle doesn't. It's only taking small amounts of fuel via the 7th injector near redline to get me where I need to be, but you'll want to do similar testing as each vehicle is different and most have needed the higher flowing Walbro pump.
One last thing to consider is the AFR Calibrator. This device allows you to tune closed loop AFR which is a VERY nice feature. There are two options:
It can be integrated into the AIC-T
making for an easier install and only a single ECU to tuck behind the dash.
The only down side is that when it's integrated it is NOT
programmable.
It can be purchased as a separate unit. This separate unit can be programmed independently. The down side is there are more wires to connect to the stock ECU and there is another box to tuck away in the dash.
I went with the integrated AFR Calibrator. It has worked great gradually dropping my AFR from 14.7 to around 13.5 as boost comes on in closed loop. I wish it dropped further to around 12.5, but I had to compromise somewhere. A 13.5 AFR in boost is MUCH better than 14.7. There is a pretty narrow range of adjustment you can do in closed loop before you throw a CEL (check engine light), so keep that in mind if you go with the programmable AFR Calibrator.
Tuning is pretty straight forward and thoroughly explained in Gadget's AIC U-Tune guide. I've started my tuning process and will dial it in once I install URD's 2.2" Supercharger Pulley.