|
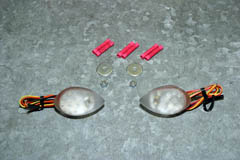
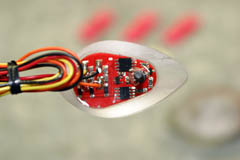
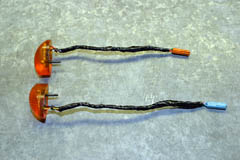
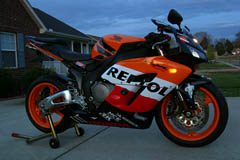
Honda CBR 1000RR Proton Flush Mount LED Turn Signals April 2006 I had been hearing great things about the Proton flush mount LED turn signals and wanted to give them a try. The main thing that appealed to me was that they bolt to the bike rather than stick on as most other brands of flush mounts do. They are CNC machined acrylic that is designed to fit in the turn signal cavity on the 1000RR's upper fairings. My only complaint was that they did not come in amber. The designers of the Proton flush mounts told me this was due to the CNC process causing uneven color in the amber acrylic, therefore they only offer them in clear. These flush mounts have built in circuitry that allows them to be wired in various flash configurations which are standard, strobe, or fade. The quality and design is top notch.
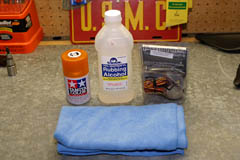
Tangogx, a fellow member of the 1000RR.net message board, did some foot work and came up with a way to color these clear Protons amber, so thanks Tangogx for showing me the light so to speak. You'll need some rubbing alcohol, a can of Tamiya TS-73 Clear Orange spray paint which should be available at your local hobby store, and a lint free cloth.
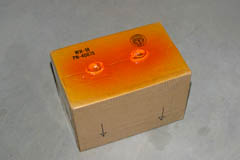
Start by taping off the back side of the Protons as well as the wiring. Next, mount them to a piece of cardboard, or to a box as I did. Then just spray light coats of the Tamiya TS-73 about 20 minutes apart on the Protons. The first coat will appear slightly yellow as shown in the picture below, but don't worry, it will become orange the more coats you apply. I was shooting for a Repsol Orange tint and went with 7 coats of the Tamiya TS-73. Just apply light even coats 20 minutes apart until the Protons are the amber tint you desire.
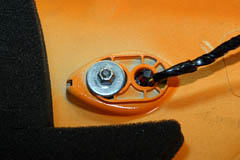
Once the paint has dried over night you can wire up the Protons. I re-used my stock plug connectors and connected them to the Proton wires. The Protons have three wires coming from them, Red, Black, and Orange. You'll need to decide how you want the Protons to flash as they are programmable. I decided to go with the strobe flash as it was the most obvious and I figured people would be more likely to see it in traffic. Once you have the wires connected wrap them in electrical tape for protection.
Next you can bolt them to the bike using the supplied 8mm lock nut and washer. Be careful not to over tighten or you could break the plastic.
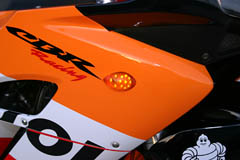
Finally plug in the connectors and test the lights. Make sure the running lights function and that the flash rate is what you expect. I'm very impressed with this product. These are the best flush mounts I've seen for any bike. They are very well made and thought out and have a quality feel to them. They mount perfectly and perform as described. The LEDs are also the brightest I've seen. I'm also running a VFX Flash Equalizer Pro, so you may need a similar device if you have LED rear turn signals in order to maintain a stock flash rate.
This page is part of a frame set. If you reached this page via a search engine please click here to go to the main page. |