|
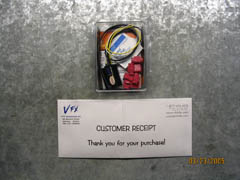
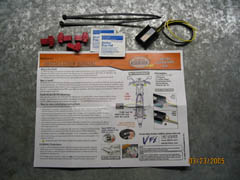
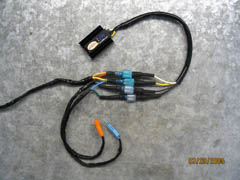
Honda CBR 1000RR VFX Flash Equalizer Pro March 2005 After installing the Clear Alternatives integrated tail light and the Mototeck LED flush mount turn signals, the turn signals on my 1000RR flashed faster than DOT spec. Some people don't mind this, but personally it's not for me. I tried various solutions to solve this problem most of which consisted of using a large power sink wired in parallel with the turn signals. A pair of such power sinks is included with the Clear Alternatives tail light. The problem is these power sinks tend to get a bit warm during turn signal operation, and I worried they would over heat or damage the plastics on the bike. I had a great experience with www.vfxkits.com when using the VFX LED Running Light Kit, so I decided to use one of their Flash Equalizer Pro units to solve my fast flash turn signal problem. As typical of VFX the unit arrived promptly, well packaged, and complete. Included in the package is the Flash Equalizer Pro unit, instructions, 2 alcohol swabs, 4 connectors, and 2 zip ties. As I noted in my previous article on the VFX LED Running Light Kit, VFX places your receipt in an envelope thanking you for the purchase. I feel this is a nice touch as most retailers simply wad the receipt up and throw it in the box with the parts.
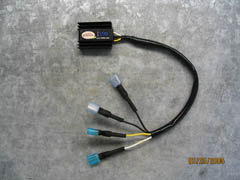
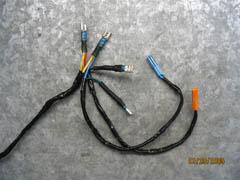
The Flash Equalizer Pro has several very nice features incorporated into it's design. First off it has a heat sink to aid thermal dissipation. It is also a 2 channel unit, meaning it can be set to 25W or 50W to control either front OR rear turn signals as well as front AND rear turn signals. This means one unit is all you need to control all the turn signals on your bike. The unit also incorporates thermal protection to keep it from over heating. The unit will shut it self down in the event it reaches the thermal threshold. If this occurs your signals will simply flash fast until the unit comes back to an acceptable temperature. Once it cools down the VFX unit will resume normal operation. 3M thermal tape is used on the back of the unit as it is recommended the it be mounted to the subframe or other metal surface to extend the heat sinks cooling capability. I set the VFX device to it's 50W setting to run some tests. I activated the turn signals without mounting the Flash Equalizer Pro to the subframe. Within 2 minutes it was hot to the touch. It took about 4 minutes for it to return to room temperature. I then ran the same test with the unit mounted to the subframe using the 3M thermal tape and it took the unit about 3 minutes to become hot to the touch, but it cooled within 30 seconds. These tests were ran with the bike parked in my garage with zero air circulating and an ambient temperature of 77F (25C). I then ran a third test leaving the turn signals running for 6 minutes while mounted to the subframe to see if the thermal protection would kick in, and it never did. I would think you could run the turn signals nearly indefinitely with the unit mounted properly. Wiring up the unit is a simple process as the device is simply wired in parallel with the bike's turn signal wires. I used insulated disconnect terminals for the connections going from the VFX Flash Equalizer Pro to the bike's turn signal wiring. This will allow the signals to be removed while leaving the VFX unit in place. As usual, I recommend using weather proof heat shrink connectors as well as heat shrink tubing to keep things bullet proof. I also put a dab of dielectric grease in the insulated disconnect terminal connections to insure they were weather proof as well as to avoid corrosion. I cut the connectors off my stock turn signals and used them with the VFX unit and turn signals to keep the wiring tidy and to avoid hacking up the stock wiring on the bike.
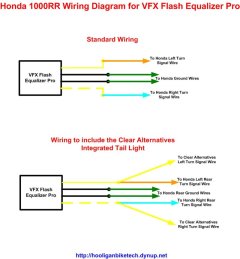
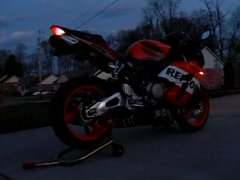
WIRING: *(YELLOW and WHITE WITH YELLOW STRIPE are PARALLEL connections)
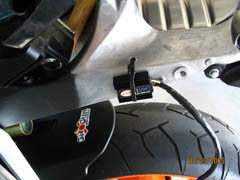
The VFX Flash Equalizer Pro can be mounted at either the front of the rear of the bike, but I recommend the rear as this will allow easy subframe mounting as well as easy wiring. I removed the rider's seat, tail section, and a couple of the under seat bolts to allow the plastic under seat to be raised a few inches. I then mounted the VFX unit to the left side of the sub frame next to the stock rear turn signal connections. I drilled a single 3/16 inch (5mm) hole in the subframe to run the heavy gauge zip tie around the subframe and the VFX unit. This applies extra pressure on the Flash Equalizer Pro aiding in thermal dissipation. Make sure you mount the device so that as much of the 3M thermal adhesive as possible makes contact with the subframe. With the under seat and tail section remounted, the Flash Equalizer Pro is completely hidden. I ran the wires from the VFX unit along side the rear turn signal wires leading to the tail light on my 1000RR to keep them tidy. I buttoned up everything and gave it a test. As you can see in the below video, both the front and rear turn signals operate at the DOT flash frequency and the front and rear signals flash in sync. I am very happy with the way the project turned out. The engineering of the VFX products is very well thought through and their customer service is impeccable. I highly recommend this product as I have had zero problems with its operation. I've been on several longer rides and have never had the thermal overprotection kick in, nor have I noticed any ill effects from the mounting location I chose for the VFX Load Equalizer Pro. If you'd like to pick one of these up or read more information on this product check them out at www.vfxkits.com.
This page is part of a frame set. If you reached this page via a search engine please click here to go to the main page.
|